Colors: windows, doors, roof

aroofing-9-15.JPG
The framers have left for two to three weeks to frame another job. The roofers should start this week. The roofing material was delivered this morning. Please keep in mind that, because of hard-to-control variables having to do with the camera and with different computer monitors, the hues you see in these photos are at best approximate.

Most of the windows have been installed. However, the bedroom windows, including the gothic window, have not yet been delivered from Andersen.

When the framers return, they’ll put the siding on the house and build the porches and deck. At that point — three to four weeks away — the exterior of the house will be done.

By the way, the windows and doors in these photos are made by Vetter, and they’re top of the line. The building supply company had them left over from a canceled job, and the contractor got me a great deal on them. The house is small, but it has 21 windows and four doors, counting the basement door. Grappling with the window budget was one of my biggest problems.

bdoor-outside-9-15.JPG
The Vetter doors have four hinges and three latch points. Nice doors.

cdoor-inside-9-15.JPG

dwindow-outside-9-15.JPG

ewindow-inside-9-15-1.JPG

fwindow-inside-9-15-2.JPG

Concept vs. reality: how are we doing?

agetting-there-9-12-1.JPG
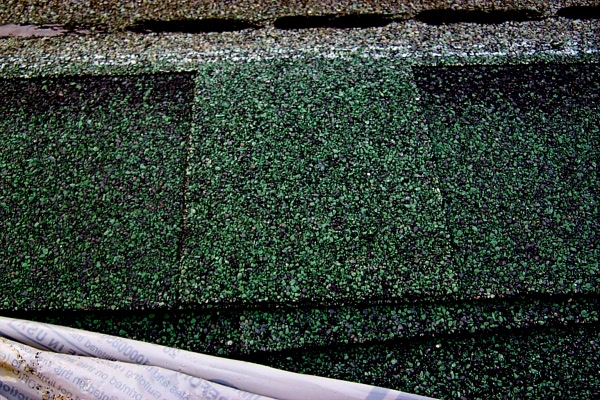
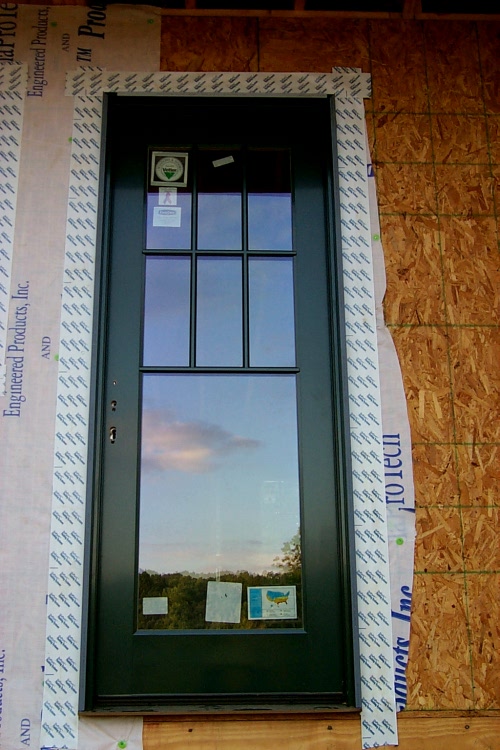
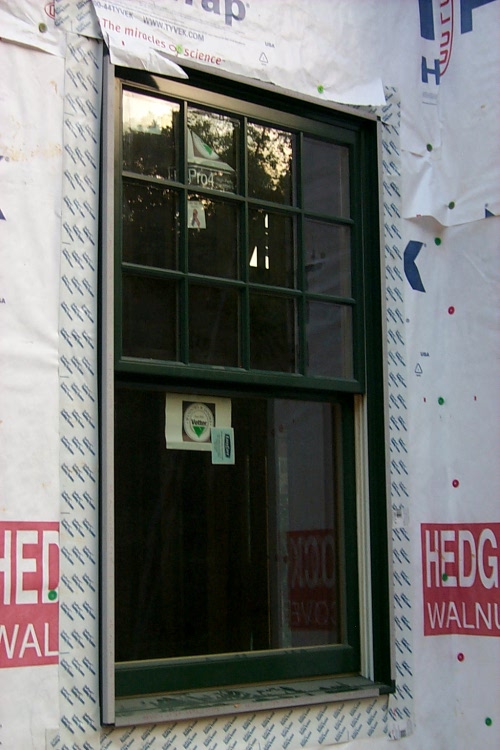
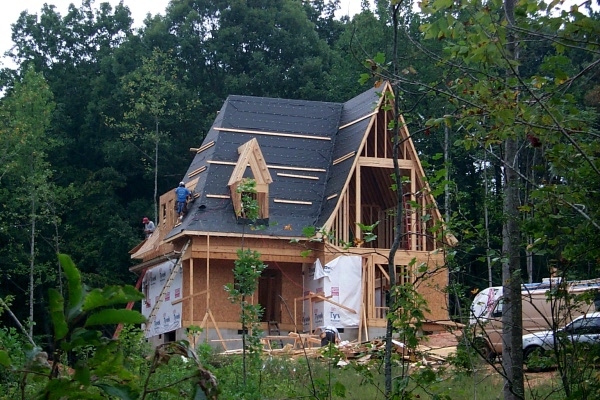
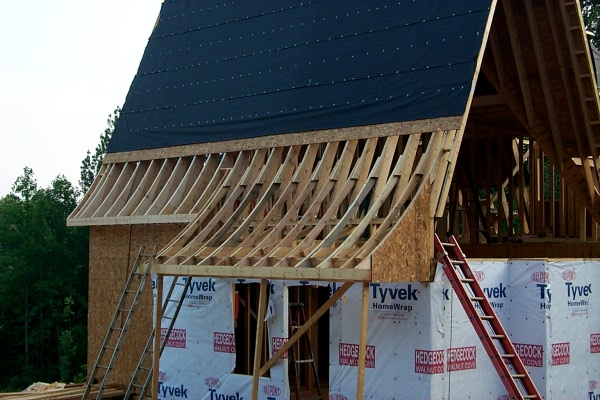
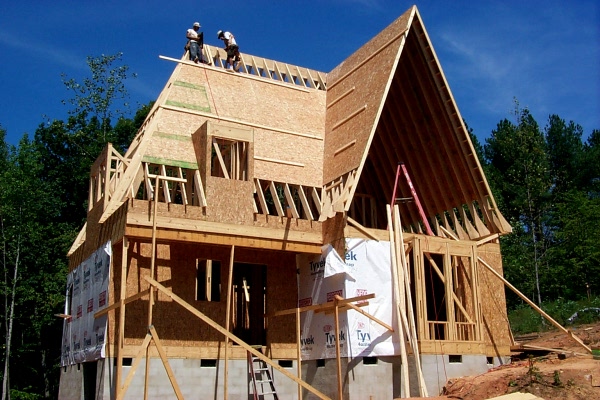
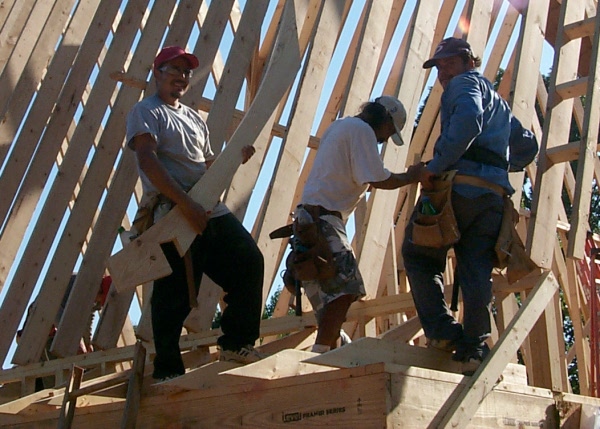
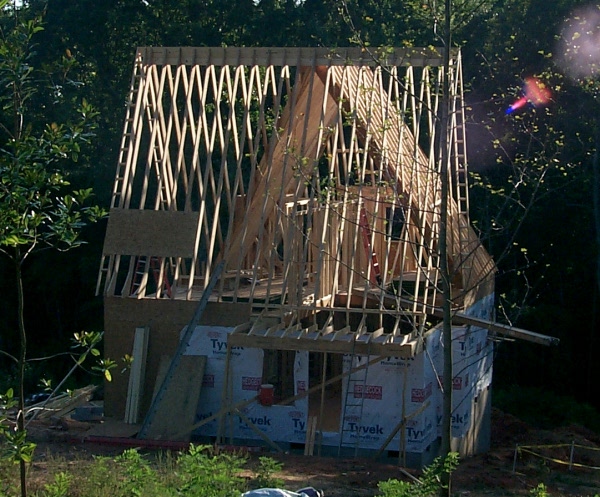
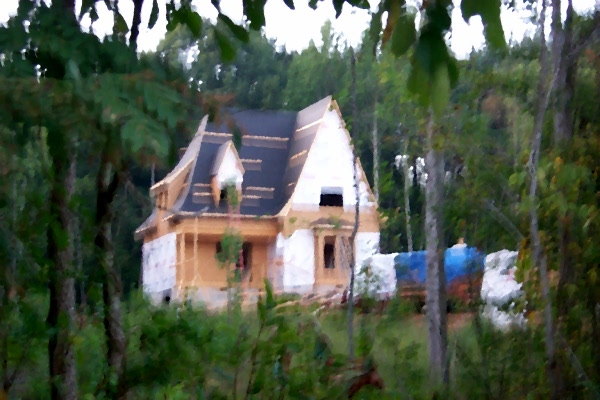
At this point the framers are taking care of detail that doesn’t make for very interesting photographs. But now is a good time to stand back and take a look at how the architect’s concept compares with the reality. In the reality shot above, the colors aren’t yet correct, because the roofing underlayer makes the roof look black (though its finished color will be green), and the house wrap makes the siding look white (thought its finished color will be a natural white pine). And of course the windows and doors aren’t yet in (they will be green). The photograph above was taken late today, and I applied Gimp’s “oilify” filter (Gimp is a photo editor like Adobe Photoshop, except that Gimp is open source). Ignore the blue blob at the lower right. That’s the tarp covering the trailer on which the exterior siding is packed and waiting.

green-gothic-cottage.jpg
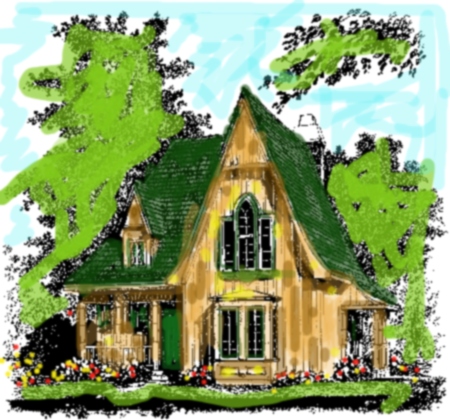
Here’s the architect’s front elevation, which I first converted to black and white, then splattered on colors to simulate the final finishes. If you merge these two images in your imagination, you can see where we’re going.

agetting-there-9-12-2.JPG
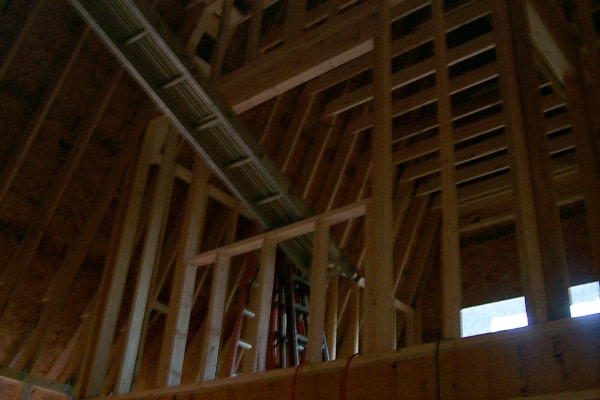
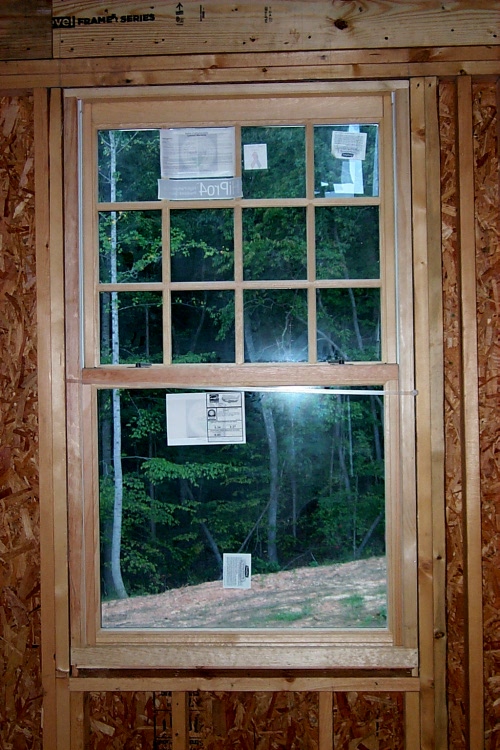
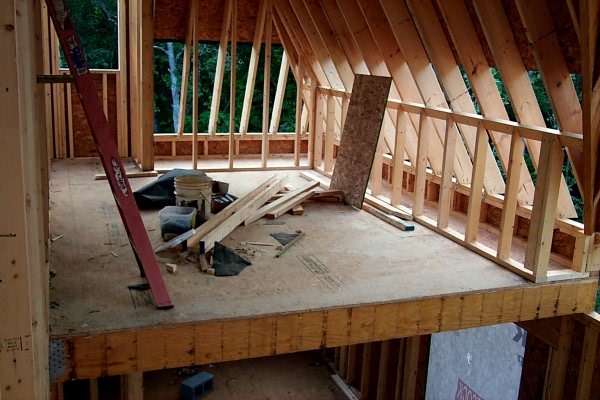
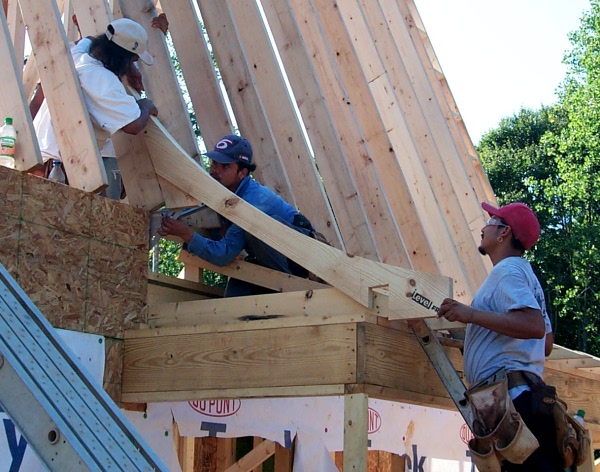
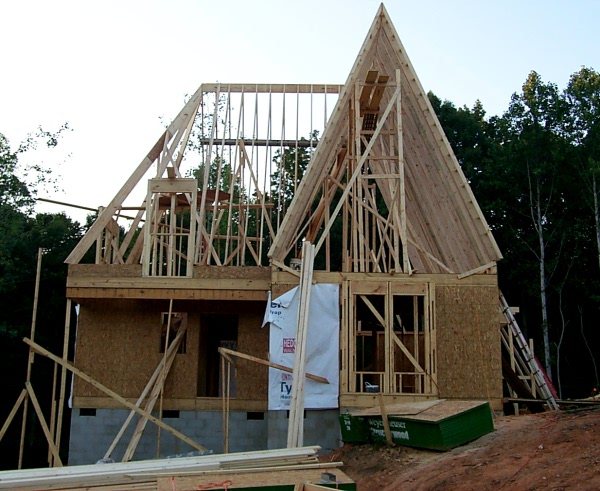
The interior framing is impressive. It’s also hard to photograph. In this photograph, I’m standing in the living room on the first floor and looking up at the window in the upstairs bedroom that overlooks the living room. That may sound strange, but it’s not strange in a gothic revival cottage. It’s very much like the upstairs nursery in “Nanny McPhee,” which also has a window overlooking the living room. The architect, Rodney Pfotenhauer, knew quite a lot about historic gothic revival homes, both the interiors and the exteriors. The walls of my upstairs bedroom also follow the roofline the same way as Nanny McPhee’s gothic upstairs nursery. The bedroom walls are vertical for 5 feet or so, then they follow the roofline to a height of 11 feet 8 inches.
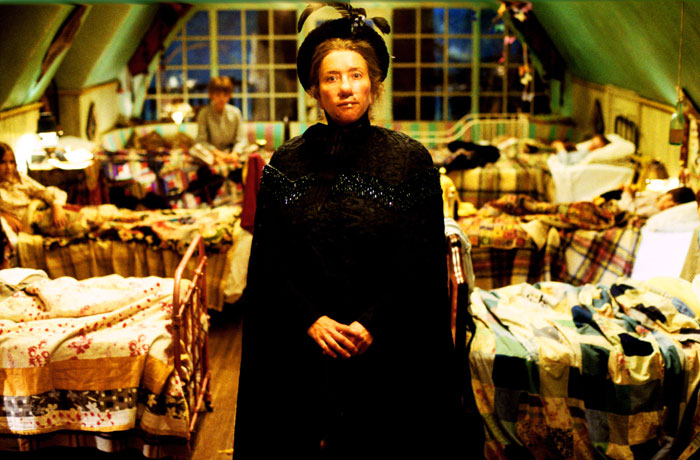
nanny-mcphee-11.jpg
Nanny McPhee

There are some good ideas for interior finish and lighting in this still shot from Nanny McPhee. There is wainscoting, some of which I hope to be able to afford, with bold colors above. Notice also the hidden lighting accenting the walls’ change of angle. I am probably going to go for bold colors for the walls in this house. Having built such an eccentric house, why diddle around with timid neutral colors on the inside?

Dormers, etc.

adormers-9-11.JPG
Both dormers are now roofed.

adormers-9-11-2.JPG
Also today, the chimney was framed in. I had to accept a number of economies in building this house. Much as I would have loved to have a classic brick chimney, I couldn’t afford it. Instead I’ll have a framed chimney, which will be covered with the same board-and-batten siding as the rest of the house. The practical penalty is not great, because I’ll have a propane fireplace rather than a wood fireplace. The propane fireplace needs only a horizontal vent; it doesn’t need a chimney at all. However, including the frame chimney maintains the profile of the house and gives me the option of turning it into a functioning chimney someday with a stainless steel insert. It’s good to have that option, but I expect to use that option only if the cost of gas gets so high that I’m forced to consider burning trees. If I was young enough to deal with the labor of burning trees, the equation would look different. But I’m too old to manage chainsaws, and the idea of flipping a switch to light the fireplace is extremely appealing.

More interior framing

aattics-9-10-1.JPG
The roof is framed and felted now, except that there’s not yet a roof on the two dormers. It rained for part of the day, so the framers focused on interior framing. It’s a little difficult to explain the photo above. In this photo, I’m standing in the second-floor bedroom and looking up toward the left-wing attic and the top of the living room. That looks like a railing on the left, but it’s actually part of the attic framing. The ceiling over the radio room is a standard eight feet high, with a very large attic above it. The ceiling over the upstairs bedroom, however, is 11’8″ high and is at the same altitude as the living room ceiling. To get from the left-wing attic to the right-wing attic, there will need to be steps 3’8″ high because the ceilings change levels. The metal scaffold in the photo is sitting on the joists of the living room ceiling, 21 feet above the living room floor.

The exterior lines are almost in…

aupdate-9-8-1.JPG
A certain personality is starting to emerge. It has a bit of a French accent, doesn’t it?

aupdate-9-8-2.JPG
Today the framers finished the tricky curves where the flared eaves meet the rounded rafters of the side porch.

aupdate-9-8-3.JPG
This is the room where I’ll probably spend most of my time. I call it the radio room. It’ll be an office, the place where I keep my computers, books, and ham radios. It’s a balcony and will have a rail overlooking the living room.

aupdate-9-8-4.JPG
The siding arrived today, neatly stacked on a trailer so that air can circulate around each piece of siding. It probably will be three weeks or so before the siding is put on, but meanwhile it can continue to cure in the September air. The siding is rough-sawn white pine, rustic and local.

Working with the weather

hannah.jpg
Weather Underground (www.wunderground.com)

Work continued on the roof today, including getting felt on top of the sheathing. Some inside framing work also got done. None of that makes for very interesting photographs, so no pictures today. The framing crew stopped work a little early today because light rain has started falling as tropical storm Hanna approaches the Carolina coast. Some of the counties to the southeast are under a flash-flood watch. However, Stokes County is not under any weather watches at present.

We’re expecting a rainy weekend from tropical storm Hanna.

The rafters are done

arafters-9-3-1.JPG
All the rafters are in, and the framers are getting ready to apply the roof sheathing. Because of the flared eaves and the curved roofline over the side porch, some extra work is needed. The curved piece he’s holding above supports the sheathing over the side porch.

arafters-9-3-2.JPG
Fitting this piece required some tricky measuring.

arafters-9-3-3.JPG
The lower end of each rafter has this piece added to flare the eaves.

arafters-9-3-4.JPG
From up the hill at the end of the day